Working with the SAP tab
-
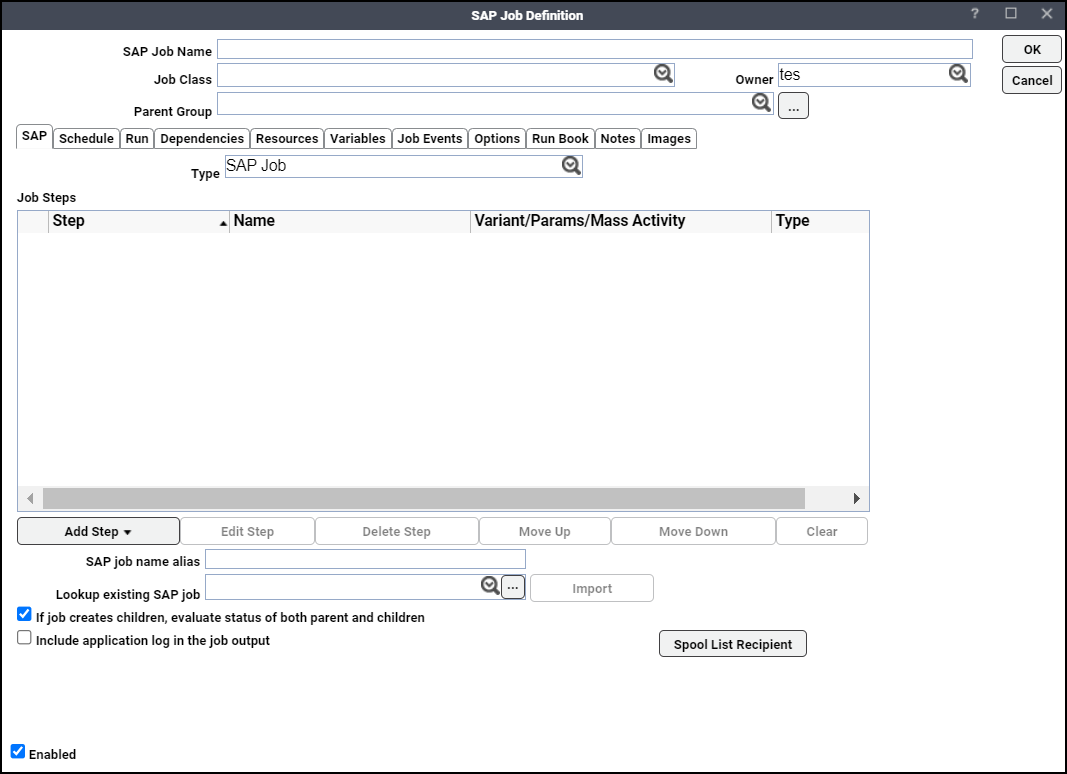
Choose the SAP Job type from the Type dropdown list on the SAP tab to display the SAP job (CCMS job) fields. Define an SAP job by entering the appropriate information.
-
Click Add Step to add various types of steps.
-
Choose one of these options to display the SAP Job Step Details dialog for the selected option.
-
ABAP Program – Define a new ABAP job step by entering the appropriate information. For more information, see Adding an ABAP Job Step.
-
External Program – Define a new external program job step by entering the appropriate information. For more information, see Adding an External Program Job Step.
-
External Command – Define a new external command job step by entering the appropriate information. For more information, Adding an External Command Job Step.
-
Mass Activity – Define a new Mass activity job step by entering the appropriate information. For more information about this job step, see Adding a Mass Activity Job Step.
Note: If you are using the SAP Business Warehouse (BW) and are licensed with TA for the BW functions, two other job-type steps are also available.
-
Infopackage – Predefined data loads (or extracts of data) identified with an Infopackage ID. When the infopackage launches in TA, it generates a job in SAP’s Computing Center Management System (CCMS) to create and process the data request. For more information about this job step, see Adding an Infopackage Job Step.
-
Process Chain – A series of tasks designed and managed as a flow chart. The process chain consists of ABAP programs, infopackages and other tasks. For more information about this job step, see Adding a Process Chain Step.
You can create new job steps for the SAP job or import predefined job steps from existing SAP jobs. TA provies a way to load the job steps with their defined variants from another SAP job. This streamlines the process of defining SAP Jobs by reusing existing job components. You can create a new SAP job in TA based on a CCMS job that has already run by using the Linked SAP Job type.
-
-
Specify an alternative name of up to 32 characters for the job in the SAP job name alias field. TA uses this name to create the job in CCMS. If you do not specify the SAP job name alias, TA uses the SAP Job Name.
-
Specify an existing SAP job name in the Lookup existing SAP job field or click ellipsis(...) next to the Lookup existing SAP job field to import an existing SAP job. Use the SAP Job Selection dialog to find and select an SAP job name to populate the Job Name field. See SAP Job Selection.
-
If you do not know the actual job name, enter a job mask in the Looking existing SAP Job field to create a list of existing SAP jobs. Select the down arrow button to display a list of the existing jobs in the SAP instance matching the job mask entered.
-
If you do not use a mask, this warning message is displayed when you click the down arrow button in the Lookup existing SAP job field: “You have requested retrieval of all SAP jobs. This can take several minutes. Due to the large number of results only the first 200 records will be retrieved. You may also want to use a job mask to limit the number of results. Do you still want to proceed?”
Click OK to retrieve the first 200 records. TA provides multiple ways to filter through the SAP jobs. If you have some idea of the job name, you can enter a few letters and use wildcard characters to filter the number of jobs displayed in the list. Note that only uppercase letters without any spaces are accepted.
Note: The system configuration setting for the list restricts available jobs. See Adding an SAP Connection to TA.
Example: Enter C* to limit your search to jobs with names starting with C.
Note: In the existing SAP jobs list, the unique SAP ID (Job Count) number assigned by SAP to each job instance is displayed next to each job.
Click Import to load the job steps from the SAP job added to the Lookup existing SAP job field into the TA database.
If the new job is imported from an existing job, the data is copied to the TA database and any changes are applied to the copy, not the original SAP job. Importing a previously run (or scheduled) job is equivalent to using the original job as a template, so the new job has no further connection to the original job.
-
-
Click If job creates children, evaluate status of both parent and children to make sure that the status of the parent job cannot be evaluated until all of the child jobs it generates have completed. This means that the success of the parent job is determined by the success of its children. A child job that completes abnormally will ensure that the parent job completes abnormally also. If this option is cleared, the status of the parent job is determined as soon as it completes regardless of the status of its children. This means that the success of the parent job is independent of the successful completion of its children. This means that the success of the parent job is determined by the success of its children. A child job that completes abnormally will ensure that the parent job completes abnormally also. If this option is cleared, the status of the parent job is determined as soon as it completes regardless of the status of its children. This means that the success of the parent job is independent of the successful completion of its children.
-
Click Include application log in the job output so that if a program creates an application return code that writes entries to the application log, the application returns code and the displays the log details in the job output. The Save Output option on the Job Definition dialog must be set to Append or Replace with Summary Only option deselected.
Note: Click the Append or Replace option and uncheck the Summary Only option from the Save Output Option section in the Options tab, if selected.
-
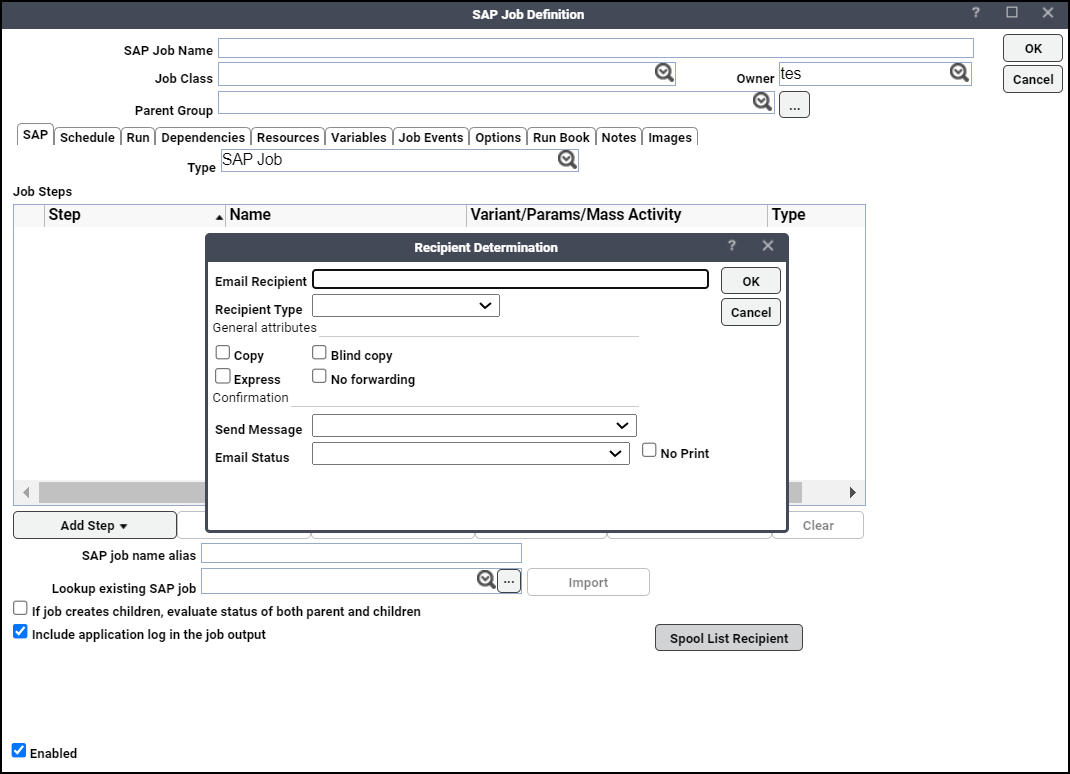
Click Spool List Recipient to pass an email address as recipient for the spool list of a job via the Recipient Determination window.
The Recipient Determination dialog contains these elements:
-
Email Recipient – Enter the email address for the recipient.
-
Recipient Type – Specify the level of the distribution lists.
General attributes:
-
Copy – Choose this option if you want the email copied to you.
-
Express – Choose this option to express the email.
-
Blind copy – Choose this option if you want the recipient blind copied.
-
No forwarding – Choose this option if you do not want the email forwarded.
Confirmation:
-
Send Message – Choose the settings for sending the message.
-
Email Status – Choose the settings for the email status.
-
No Print – Choose to not to print the email.
-
-
You can also choose
Edit Step – Click Edit Step after selecting a job step to display the SAP Job Step Details dialog showing the characteristic of the job step.
Delete Step – Click Delete Step to delete a selected job step.
Move Up and Move Down – Click Move Up or Move Down to change the sequence in which the selected job step is executed.
Clear – Click Clear to remove the job and all its related steps, and remove all the information from the Job Steps pane in the SAP tab of the SAP Job Definition dialog. However, the SAP Job Name, Job Class, Owner,and Parent Group fields are retained. Any information entered on other tabs also remains intact.
Enabled checkbox – Clear the Enabled option to deactivate the SAP job definition. When a SAP job definition is enabled (active), it is added to the production schedule. When a job is not enabled (inactive) it is not added to the production schedule during compilation.
Note: Note that if the job has previously been submitted to the production schedule and if the job is presently in a pre-launch status, clearing this option removes the job from the production schedule. Furthermore, if the job had dependents, those dependencies are released.
-
Click OK to save the changes.